4.1 Venndir Borders
The underlying geometry of each polygon is represented as a
JamPolygon object (Ward 2025), a new S4 object designed for
geometries used in Venndir.
An important distinction from typical polygons in R is that the objects are capable of describing three borders:
- 'border': Line along the exact edge of the polygon.
- 'innerborder': Line drawn on the inside edge.
- 'outerborder': Line drawn on the outsideedge.
JamPolygon objects allow adjacent borders to co-exist without
rendering two borders on top of each other.
Figure 4.1 illustrates four examples of borders, showing the problem being addressed with innerborder. The left object has two halves labeled A and B, with borders gold and purple, respectively. When using 'border' the gold border is covered by the purple border down the center line between A and B.
Instead, the next object with C and D shows the effect of using 'innerborder', with the respective gold and purple borders both visible. Also notice the object is not enlarged by adding the border, the line width extends inside the polygon.
The next panel shows E and F, with 'outerborder' wrapping around them both. The outerborder extends outside the object, and in fact the outerborder does not extend inside the object at all.
The right panel shows G and H, and includes each type of border, drawn in order: innerborder, outerborder, border. The 'border' was configured as a thin line, otherwise it could potentially cover both the innerborder and outerborder.
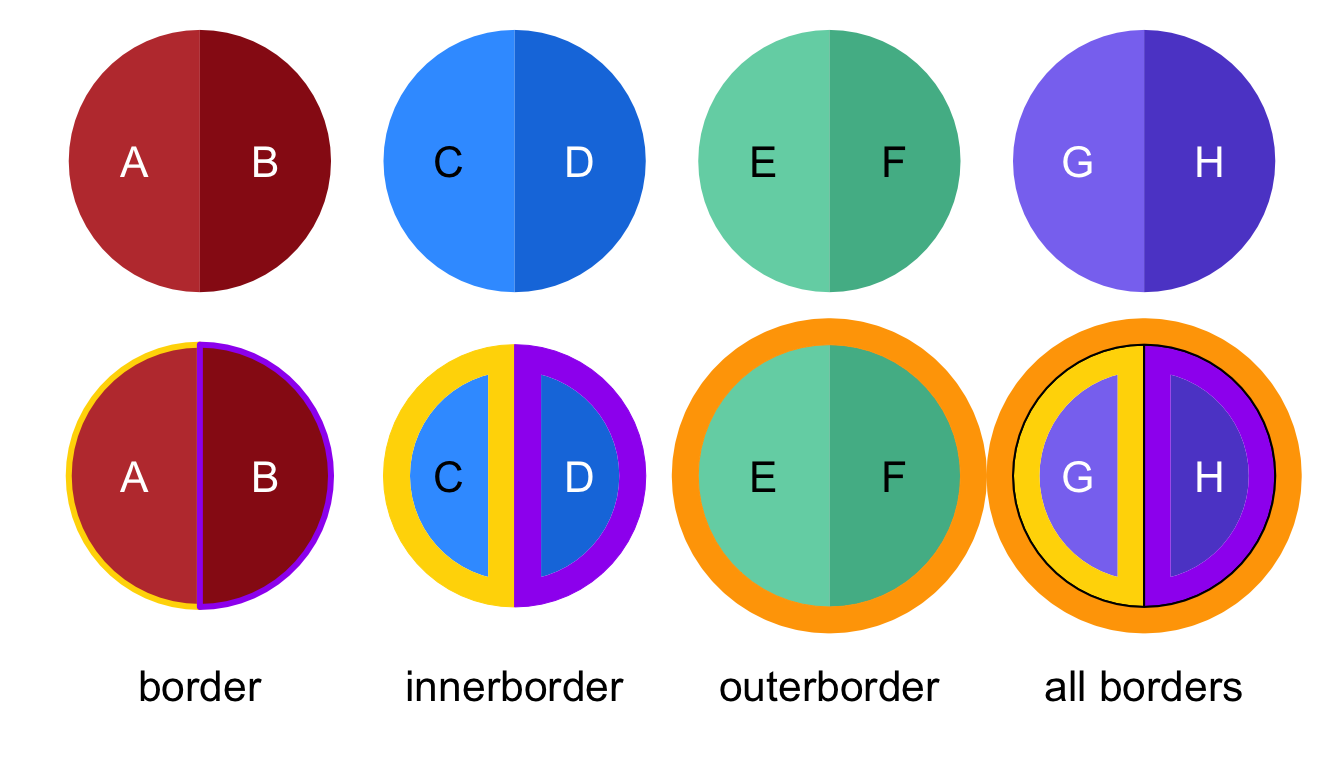
Figure 4.1: Four standard objects are displayed on the top row. The bottom row shows the effect of adding distinct borders: border, innerborder, outerborder, and all borders.
4.1.1 Venndir Rendering Steps
Venndir draws borders in a specific order to provide a layering effect, followed by other graphics elements such as labels and connecting line segments.
Venn Sets
- The
outerborderis drawn usingset_colorsdarkened slightly. - Other borders are not drawn:
fillcolor,border, andinnerborder.
- The
Venn Overlaps
- Colors from the overlapping sets, from
set_colors, are blended. - The
fillcolor is drawn after applyingpoly_alpha. - The filled region does not include the
innerborder.lwdif theinnerborderis defined. - The
innerborderis drawn using thefillcolor, darkened slightly, and with no alpha transparency. - Other borders are not drawn:
borderandouterborder.
- Colors from the overlapping sets, from
Count Labels
- The font colors are adjusted for contrast, relative to the background colors behind each label.
Item Labels (if enabled)
Line Segments (if enabled)
Venndir Legend (if enabled)
Main Title (if enabled)
The order that Venndir polygons are rendered, as described in (1) and (2)
above, is determined by the order of polygons present in the Venndir
'jps' S4 slot.
For example, if v is a Venndir object, the JamPolygon entries
are accessed using v@jps.
The order in 'jps' can be modified, but all entries
are required for the Venndir object to be valid. For example,
Highlight Venn Overlaps re-orders 'jps' to place the highlighted
overlap region last, thereby preventing border and outerborder
from being overdrawn by other entries in 'jps'.
Additional JamPolygon entries may be added to v@jps, however
the new names must not conflict with existing names(v@jps).
Additional notes:
- When plotting a
Venndirobject, the ellipses'...'can be used to provide custom border settings, and are described in Customize Venndir borders. - By default,
Venndirobjects do not useborder, they useouterborderfor sets, andinnerborderfor overlap regions. - The overlap regions use colors that are blended based upon
set_colorsdefined for theVenndirobject. - Default borders are quite subtle, but the effect is more distinctive
when using larger values for
innerborder.lwdandouterborder.lwd. - It is usually best to use the same
numericvalue for bothinnerborder.lwdandouterborder.lwd, due to the way the borders are layered.
4.1.2 Customize Venndir borders
The border options can be customized directly when plotting
the Venndir object, adding named arguments to any function
that produces a Venndir plot:
* venndir(...)
* render_venndir(Venndir, ...)
* plot(Venndir, ...)
A few common alternatives are shown in Figure 4.2.
v1 <- venndir(make_venn_test(),
   innerborder=NA, outerborder=NA)
v2 <- venndir(make_venn_test(),
   border="grey40", border.lwd=1,
   innerborder=NA, outerborder=NA)
v3 <- venndir(make_venn_test(),
   innerborder="white", innerborder.lwd=1,
   outerborder="white")
v4 <- venndir(make_venn_test(),
   label_style="lite box", innerborder.lwd=1,
   outerborder="white", outerborder.lwd=2)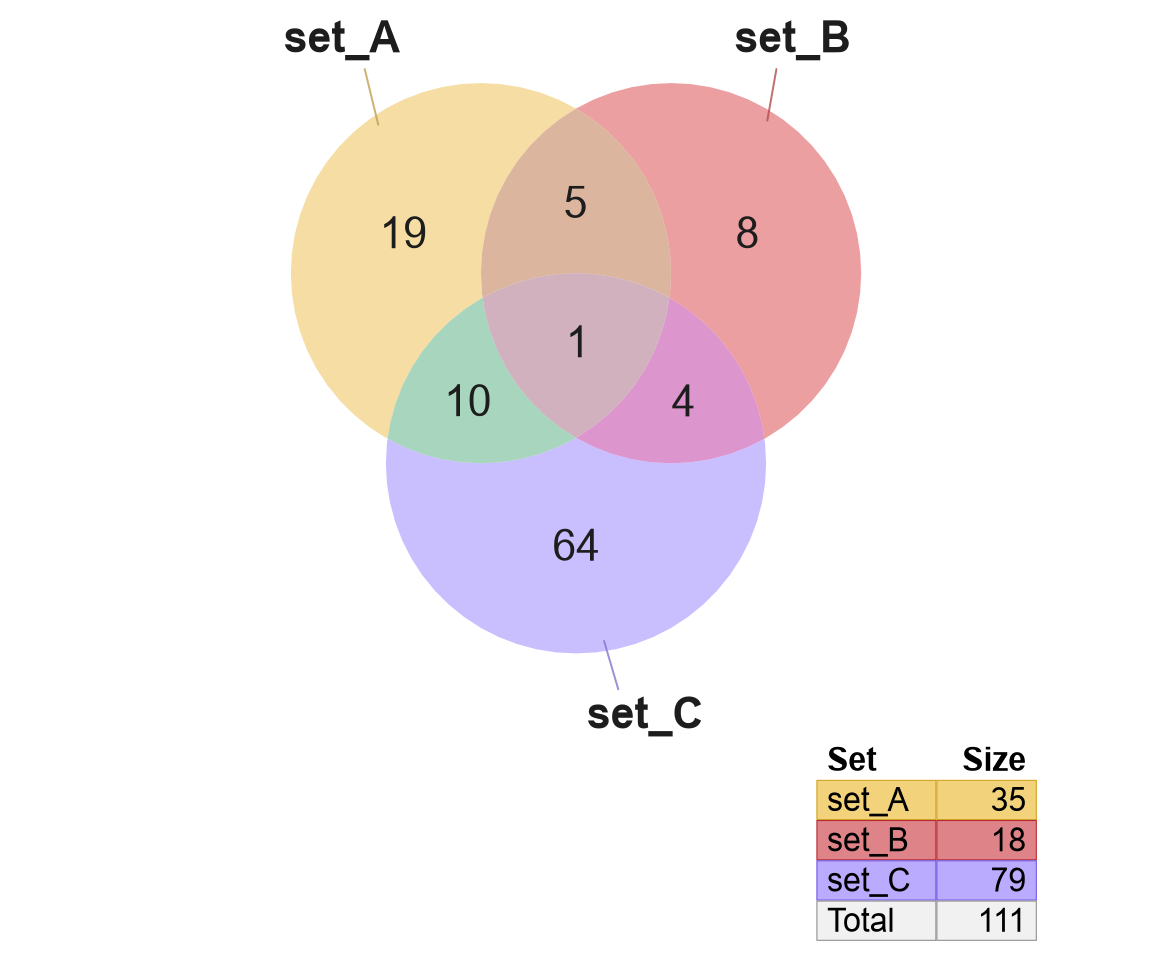
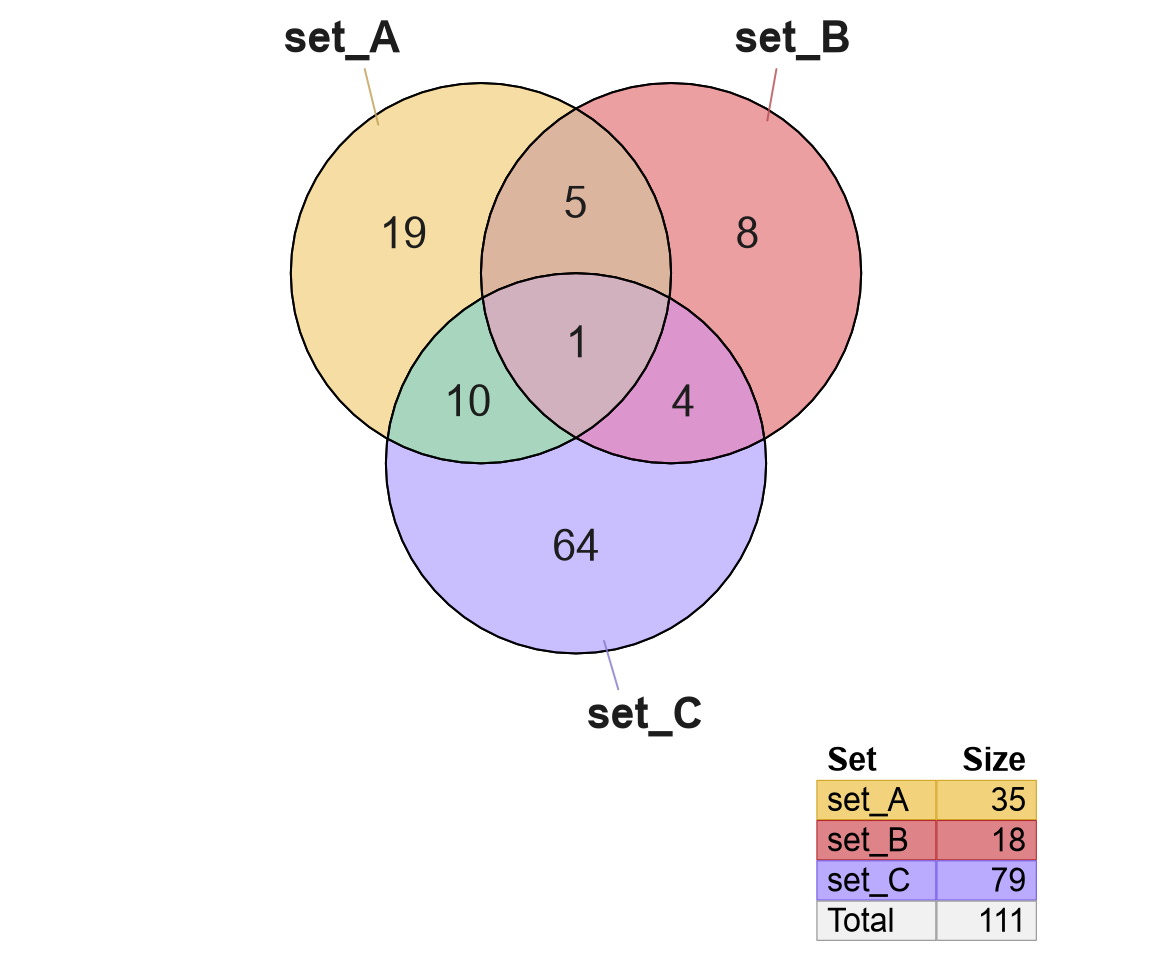

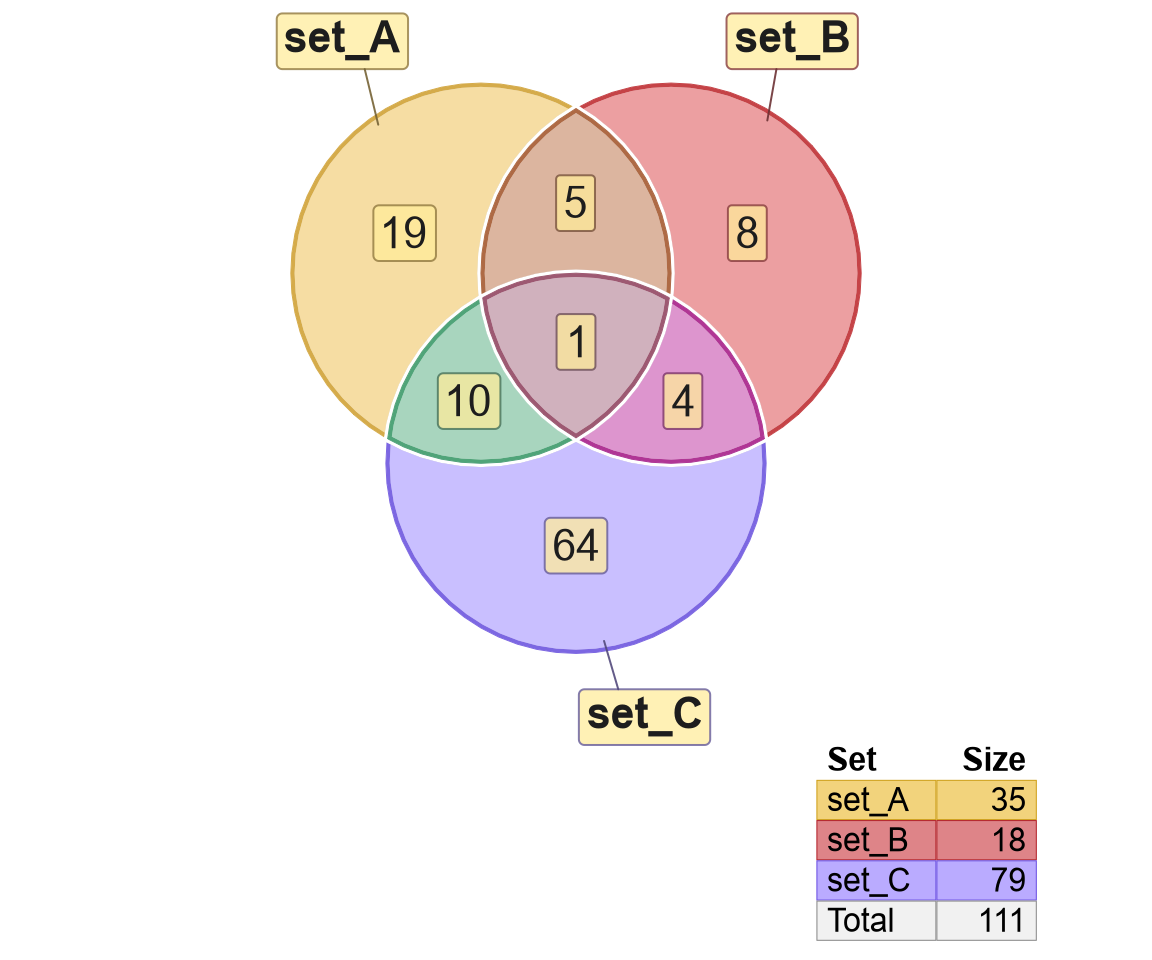
Figure 4.2: Venndir diagrams demonstrating common border styles.
These options are useful for global changes to borders, but are not ideal to modify a specific region. For those customizations, see Modify Venn Overlaps.